Enabling virtualization in BIOS is essential for running virtual machines and containerized applications. You also need to enable virtualization in BIOS if you want to test applications in different operating systems without switching hardware. Some manufacturers disable virtualization in BIOS by default, but enabling it is pretty simple — and it takes about 10 minutes, tops!
This guide explains how to enable virtualization in BIOS based on your hardware manufacturer. (You can jump to the section you’re looking for by clicking it in the table of contents).
System requirements checklist for enabling virtualization in BIOS
First, make sure your hardware meets the following requirements:
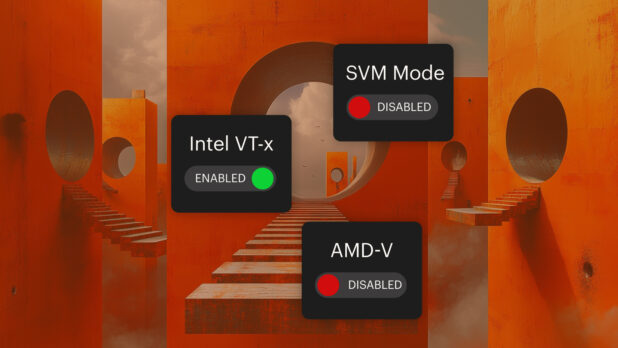
- Processor supports virtualization: Intel VT-x for Intel processors or AMD-V for AMD processors. You can verify your CPU specifications on the manufacturer’s website or using CPU-Z.
- Operating system is compatible: Windows 10 Pro or Enterprise, Windows 11
- Note: Microsoft is ending support for Windows 10 in October 2025, so you might want to move to Windows 11 before enabling virtualization.
- Note: Microsoft is ending support for Windows 10 in October 2025, so you might want to move to Windows 11 before enabling virtualization.
- BIOS is up to date: Update BIOS if it’s out of date.
- RAM is adequate: You’ll need at least 8GB of system RAM to enable virtualization in BIOS and run a single virtual machine. (Note: This is not ubiquitous across platforms. It’s mostly dependent on requirements for the OS/App being deployed and less on the hardware platform.)
How to enable virtualization in BIOS Windows 10 and 11
- Restart your computer and enter BIOS/UEFI settings by pressing the appropriate key during boot.
- Navigate to Advanced Settings or CPU Configuration, depending on your BIOS version.
- Find the Virtualization Option:
- Look for Intel VT-x, AMD-V, or SVM Mode (for AMD processors).
- Select “Enabled” from the menu.
- Save changes and exit (usually by pressing F10 and confirming the action).
- Verify virtualization: After rebooting, open Task Manager > Performance > CPU, and confirm “Virtualization” is listed as “Enabled.”
In Windows 11, you can also get to BIOS by going to Settings > Update & Security > Recovery > Advanced Startup > UEFI Firmware Settings. You need to enable Hyper-V to support virtualization.
How to enable virtualization in BIOS ASUS
- Restart your ASUS system and press DEL or F2 to enter BIOS.
- Press F7 to go to Advanced Mode.
- Navigate to Advanced > CPU Configuration.
- Find Intel Virtualization Technology (for Intel CPUs) or SVM Mode (for AMD CPUs).
- Change the setting to “Enabled.”
- Press F10 to save and exit.
- Restart your PC and verify the setting using Task Manager or other system tools.
How to enable virtualization in BIOS HP
- Restart your HP device and press F10 to enter BIOS.
- Use the arrow keys to select the Configuration tab.
- Locate Virtualization Technology (VTx/VTd) and enable it.
- Save and exit BIOS (press F10 and confirm changes).
- Reboot and check virtualization status in Windows.
How to enable virtualization in BIOS Lenovo
Tablets and notebooks:
- Restart your Lenovo device and press F1 to enter BIOS.
- Navigate to Security > Virtualization and press Enter.
- Find Intel(R) Virtualization Technology and press Enter.
- Choose Enable and press Enter.
- Press F10
- Press Enter on Yes to save the settings.
Desktops:
- Restart your Lenovo device and press F1 to enter BIOS.
- Navigate to Advanced tab and press Enter on CPU Setup.
- Find Intel(R) Virtualization Technology and press Enter.
- Choose Enable and press Enter.
- Press F10
- Press Enter on Yes to save the settings.
How to enable virtualization in BIOS Dell
- Reboot your Dell system and press F2 during startup to enter BIOS.
- Select Virtualization Support > Virtualization.
- Set Virtualization to “Enabled.”
- Enable Virtualization for Direct-IO (or VT-d).
- Save and exit.
FAQ
Why do some manufacturers disable BIOS virtualization by default?
Manufacturers may disable virtualization for reasons like:
- Security risks: Enabling virtualization can expose systems to certain vulnerabilities, particularly if malware or unauthorized software exploits the hypervisor layer.
- Hardware compatibility: Manufacturers often disable virtualization by default to ensure broad compatibility across different system configurations and to prevent unintended system behavior.
- Enterprise policy control: Some organizations prefer to keep virtualization disabled to prevent unauthorized use of virtual machines or changes in system configurations that could affect enterprise security policies.
Do you need to enable virtualization in BIOS to use RMM tools?
If you’re using agentless RMM tools, you need to enable virtualization in BIOS. But you don’t need to enable virtualization in BIOS to use agent-based RMM tools like Syncro.
Why use virtualization?
With virtual machines, you can isolate applications and services, which can improve stability and uptime. For example, if your email and database run on separate machines, your database would be unaffected by a web server crash that makes email unavailable.
Try Syncro’s platform-agnostic IT tools
Whether you need to check system uptime in Windows or remotely troubleshoot a Mac, Syncro’s got you covered. We give IT teams all the tools they need to configure and manage environments and devices.
Discover why more people are making the switch to Syncro. Start your free trial today.

Share
Related Resources