Table of contents
Hey all,
We hope you’re gearing up for an awesome weekend ahead.
We wanted to kick things off for you by sharing a highly-requested update to the Syncro Documentation Center (or Wiki). This module is used to upload helpful instructions, processes, or FAQs for your team members and/or clients.
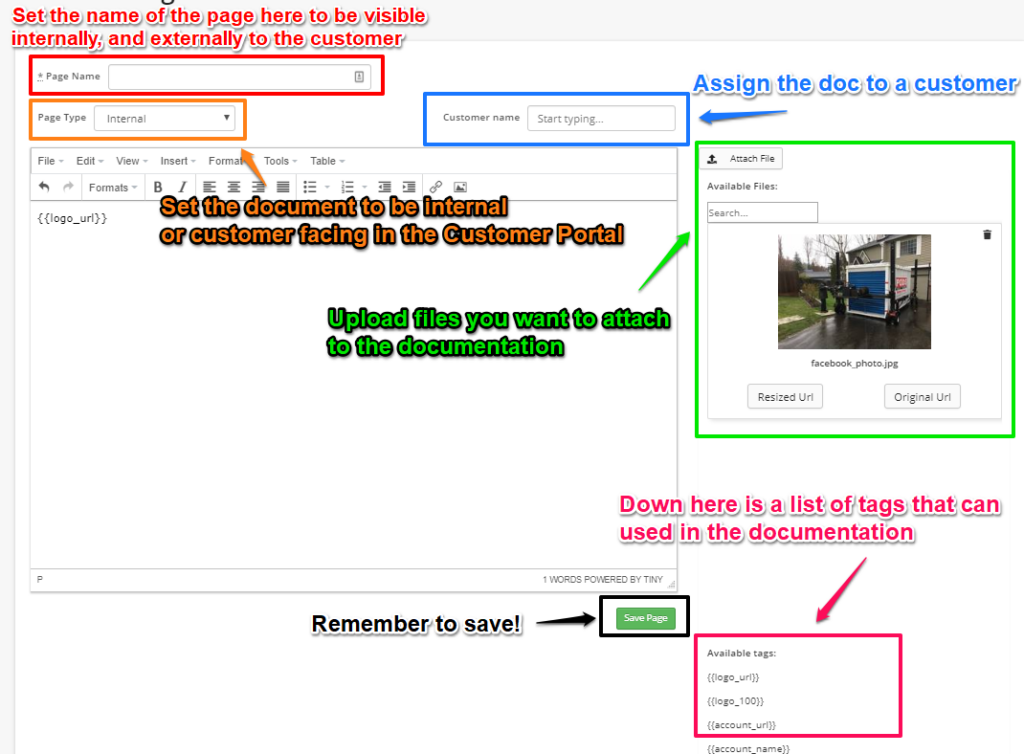
We’re happy to share that you can now upload photos directly into your Wiki pages!
Prior to this update, photos could only be shared within Wiki pages via URLs instead of uploading them directly into a Wiki page. With this update, you have a more convenient way to give your team members and/or clients step-by-step instructions through the use of visuals.
To upload an image to a Wiki page in your Syncro account:
- Log into your Syncro account.
- Head to the Documentation Center (Wiki).
- Click on an existing Wiki page to edit or create a new one using the “New Page” button in the upper right-hand corner of the page.
- Click on the “Attach File” button on the far right side of the editor page.
- Follow the instructions in the modal to upload an image from the source of your choosing.
- Click on either the “Resized URL” or “Original URL” button to copy the image link to your clipboard.
- Go into the Wiki page editor on the left, and click the “add image” icon or go to the “Insert” dropdown menu and select “image.”
- Paste the image URL into the “Source” field.
- Click “Ok.”
- Watch the magic happen (i.e. the image insertion).
- Be sure to click “Save Page” for the changes to take effect.

You can also check out our Documentation Center Help Center article for more information.
We hope you enjoy this update, and look forward to bringing you more soon.
Cheers,
The Syncro Team
Share


